The Custom Installation is recommended for users already knowing Join internal mechanism and or wanting to use an external database. It allows you to choose your installation mode and configure the connection settings to database.
This installation process is not linear: depending on your choices the steps described here in subsections may be required or not, ordered or not so that the progression bar on the left may have different bullets. For simplicity, we recommend you to follow the navigation links at the end of each step.
The first choice to take is whether you want to install Join on a single machine (the one hosting the Join web application) or whether you want to realize installation on two machines thus dissociating asynchronous processing (scripts) from synchronous services (web application).
Screenshot: Choosing single/dissociated installation
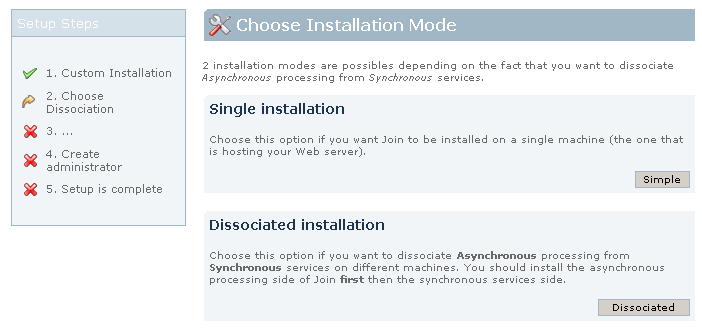
Go to Database configuration step if you have choosen a Single installation or go to Application side choice step if you have choosen a Dissociated installation.
Screenshot: Choosing embedded/external database
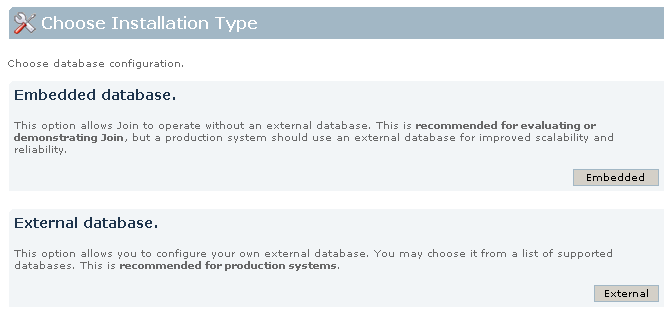
Go to Configuring administrator account step if you have choosen an Embedded database or go to Configuring external database/datasource step if you have choosen an External database.
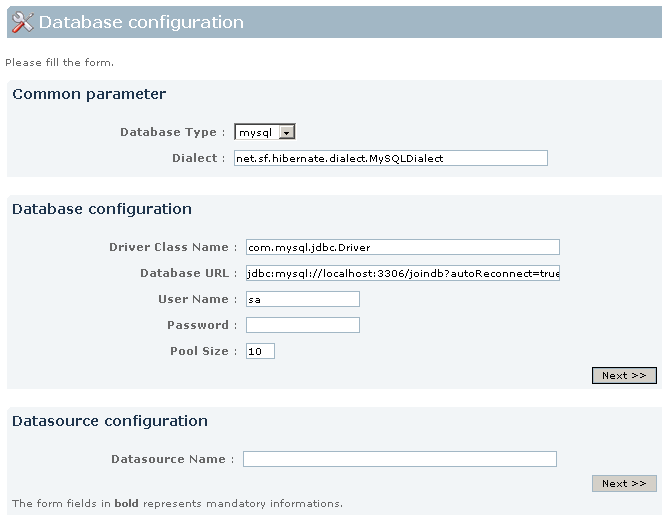
You may choose a direct database access configuration or a database access through a JNDI datasource configured onto the application server Join is running in. These two options need a common parameter that is the kind of database you're connnection to (so you can tell Join which "dialect" it needs to speak).
The first option uses a standard JDBC database connection. Connection pooling is handled within Join. You will need to know:
The second option required that you have configured a datasource into your application server, and know its JNDI name. Note, some servers will have JNDI names like jdbc/datasourcename, others will be of the form java:comp/env/jdbc/datasourcename. Consult your server documentation.
Screenshot: Configuring external database/datasource
Next and last step is Configuring administrator account step.
Now that you have choosen a dissociated installation, you have to tell the setup wizard whether you are now installing the synchronous services side or the asynchronous processing side of the application.
Note, you first have to install the asynchronous processing side. This allows you to specify the connection parameters used by the web application to access it. Then you will have to repeat the installation, on another server, for synchronous web services side and give the access parameters specified before.
Screenshot: Choosing application side
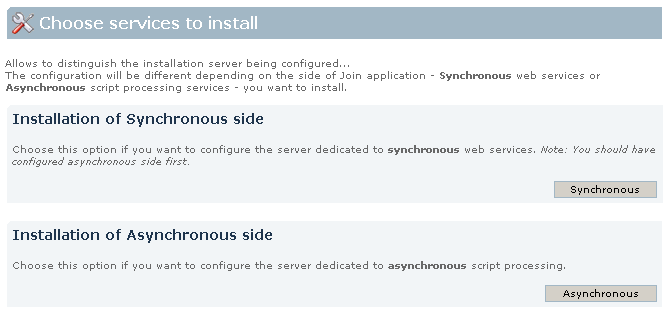
Go to Access to asynchronous side step if you have choosen the installation of Synchronous side or go to Access from synchronous side step if you have choosen the installation of Asynchronous side.
You are now installing synchronous side of Join application. You have to provide here the web URL and the messages broker URL of the asynchronous side you have previously installed. The web URL is an HTTP URL (eg. http://asynchost.mycomp.com:8080/join) ; the messages broker URL is something like tcp://asynchost:61616 (depending on the port you have specified when installing asynchronous side).
Screenshot: Configuring access to asynchronous side
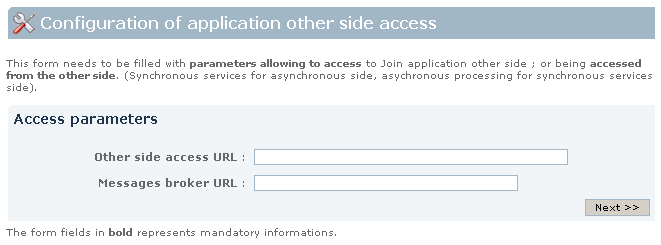
Next step is Database configuration step.
You are now installing asynchronous side of Join application. You have to specify the listening port of the integrated messages broker in order to be reached from the synchronous side. (If in doubt, just go with the default provided).
Screenshot: Configuring access from synchronous side
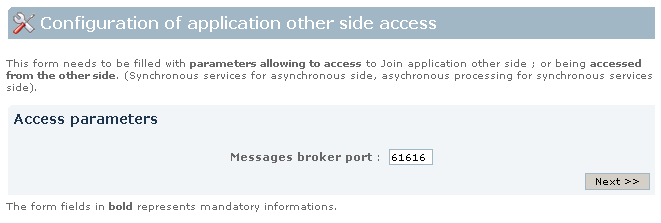
Next and last step is Configuring administrator account step.
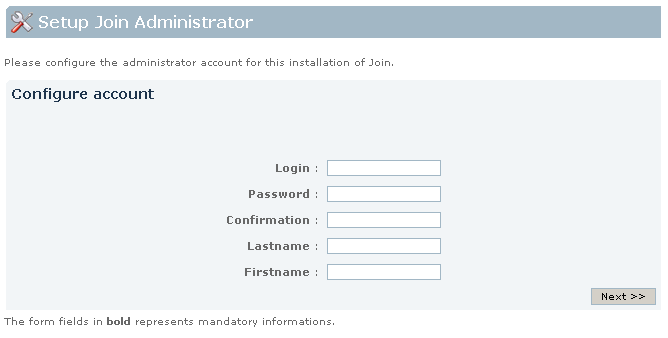
This is the setup last step. In this step, you will define Join's first registered user. This user will have administrative privileges over the entire Join installation. After you've finished setup, you will use this user to add other users and to assign them permission to access various parts of the Join site. In the form displayed, enter a username, password, last and firstname for administrator account.
You are now ready to start using Join !
Screenshot: Configuring administrator account
